08
2014My travel workflow with iPhoto on iPad and D800 raw photos
 Before I went to the 2014 Everest trek I had decide how my backup strategy will be. My first impulse was to use either an image tank or a USB hard drive. For the later I would have been dependent on someone with a laptop. But then I learned from an episode Chris Marquardt’s podcast Tips from the Top Floor that most hard drives are only specified to work up to 3000m. This is because the drive head is floating on a cushion of air and since air becomes thin up there…
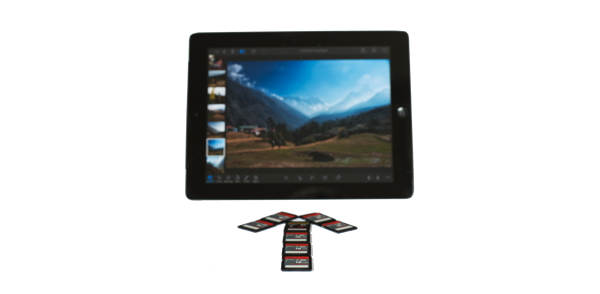
Then I decided to pack my 64GB iPad together with the SD card reader and see how far I get. Since I brought 15 SD cards with 16GB capacity with me, obviously a 64GB iPad would not be able to allow a complete backup. So I came up with this capture workflow.
1) Capture Workflow
- Shoot a a lot of photos filling up the SD card. I usually shoot RAW+JPEG
- Upload all pictures to the iPad, including RAW files
- Do the pick/reject dance with the new pictures. There is a nice swipe gesture to do this so this can go pretty quickly. I really apply the first stage of Chris’ 1 hour 1000 pics workflow. The only thing I often do is to crop every now and then before I do this judgement. Since cropping can turn a picture completely in its message and quality I add this step to that stage of Chris’ workflow.
- If you did not fill up the SD card completely, repeat the steps above until it is full. It is essential not to delete rejected pictures until you finished filling up the card or else you need to manually pick the new pictures during import.
- Select all rejected photos. This is the advantage of the iPhoto app because you can select by certain filters
- Delete the rejected photos
- Repeat over with the next SD card
If you keep a good discipline in picking only the best pictures you can keep a backup of many SD cards with the best pictures. You only need at least enough space at all times to load an entire SD card at the end.
The problem with the synchronization between iPhoto on iPad with iPhoto or Aperture on the Mac is that no metadata or processing data will be transferred. In my case, however I wanted to post pictures to this blog and so I also had my workflow to do this on the trek.
2) Processing and Blogging Workflow
- Open iPhoto
- Flag the pictures for the blog and filter them
- Do the processing
- Export to the camera roll
- Open the WordPress app
- Write the blog and attach the pictures from the camera roll
- Post the blog (including picture upload)
It was interesting to see that uploading the text and pictures to wordpress was much easier than sending or receiving emails. It shows that SMTP and FTP are totally making a difference when the bandwidth is bad.
3) Import Workflow
After coming home I had to make sure that I imported first from my iPad. The reason is that I already had done a preselection on the trek by weeding out the mediocre pictures. So here is my import workflow:
- Import the pictures from the iPad into your photo management program (Lightroom, Aperture, iPhoto,…)
- Give those pictures a 3 star rating or whatever you find fit (depending on how strict you judgement on the capture workflow was)
- Import from the SD cards. Make sure to enable the setting to not import duplicates
- Now work on the pictures you imported from the iPad and refine the star ratings.
- Start processing your pictures from the highest star rating and make your way down to lower ratings.
It’s really unfortunate that the processing made in iPhoto for iOS is not synchronized to the other Apple products on the Mac. I expect that this will get much better with the new photos app in iOS 8 and OS X Yosemite.


